")
")
Purpose
- It is important to understand that an image converter cannot replace patterns specially created by designers. The process of preparing the source image and creating the chart by designers is much more complex than automatic conversion.
- The image converter is intended for those who want to try to make charts for themselves using a photo, an image, or a pixel art picture.
- The converter is available for PRO users with limited settings, you can also buy full [FULL] access to the converter.
Opening an image
You can open any image on your device "With CS Paradise". Also you can enable the display of pictures in the Paradise browser and open pictures directly from there.
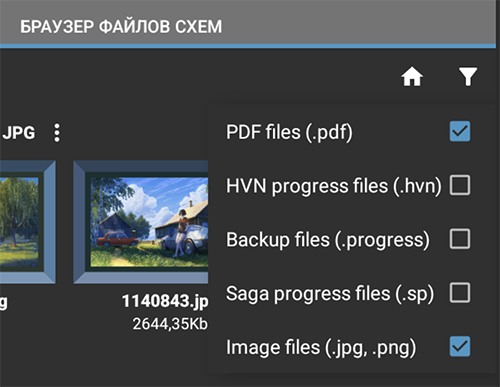 Filtering options in the Browser
After opening, you are taken to the Crop tab, where you select either the entire image or some part of it.
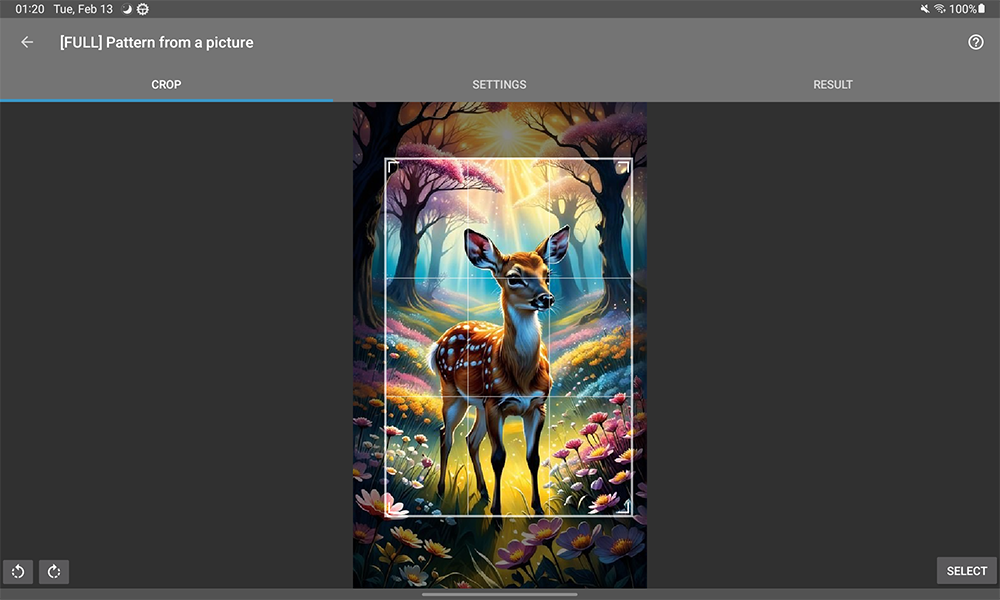 Selecting an image area for further processing
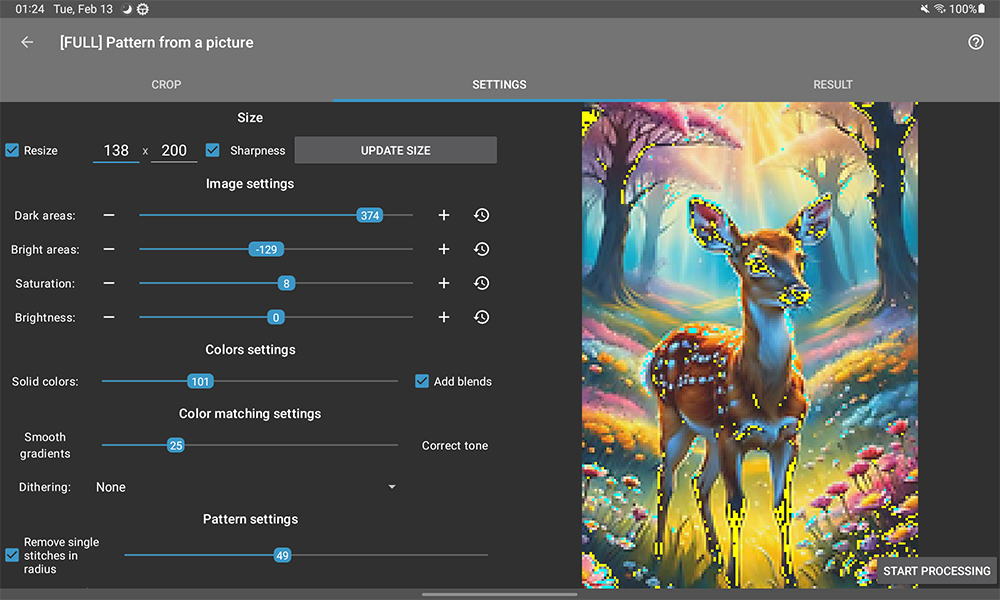
Conversion settings
 Default settings
Size
If the image is too large, you can make it smaller by setting the desired width and height. The Sharpness option makes the reduction result sharper. After changing the options, click Update Size
Image Settings
- Dark areas - allow you to make dark areas of the image lighter; areas darker than the darkest thread color will be marked in yellow. It is not necessary to completely lighten the dark areas; this setting allows you to avoid completely filling with black threads.
- Highlights - allow you to darken light areas of the image; areas lighter than the lightest thread color will be marked cyan. Again, it is not necessary to completely darken such areas; this setting allows you to avoid filling the threads with white. Remember that usually the final embroidery may be slightly darker than the preview on the screen.
- Saturation - adjust the saturation of colors.
- Brightness - full offset of the brightness of the picture.
Color settings
- Number of solids - the maximum size of solid colors after conversion. The resulting palette size may be smaller than this value when duplicate and minimal colors are removed. And it can also be more when blends are added.
- Add blends - when this option is activated, after the first run, blends are formed from the final palette and a second run is made.
Color comparison settings
- The color comparison mechanism works simultaneously using two algorithms. One is simpler, it produces smoother transitions, due to a simpler consideration of color features, the other is very mathematically complex, in which the difference in tones is also taken into account when comparing. The setting allows you to mix the result of calculations, obtaining the desired result. In colorful pictures, you can move it towards gradients; in pictures with people, it is better to move it closer to the exact tone.
- Dithering is an algorithm that allows you to smooth out sharp color transitions by mixing dots of a different color. If you just need color spots, then turn off dithering. In ordinary paintings, it produces better results.
Pattern settings
- Remove singles - single colors in a given radius will be replaced with a similar color from this radius.
- Minimum stitches per color - colors with less than the specified number will be replaced with similar colors from the palette. Be careful with this setting, if there is a single but important element in the image, the number of its stitches may be less than this minimum and it will be replaced.
 Changed settings to suit the image
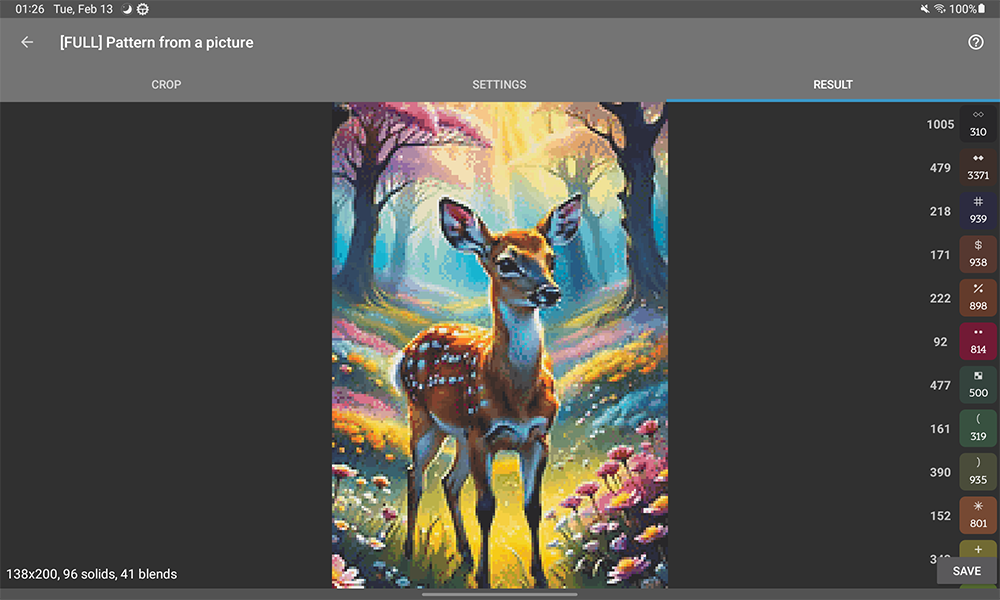
Result
The final pattern is saved to the Image Imports folder in your CrossStitch home folder.
On the result page you can see the parameters of the resulting pattern and a list of colors with the number of stitches. You can click Save and go directly to viewing the chart. When you exit the chart, you will return to the converter again if you suddenly need to change the settings.
Final pattern
Before embroidering, carefully study the final result. Through the palette editor you can adjust some colors. If you don’t like something, it’s better to return to the converter again, or turn to professionals.
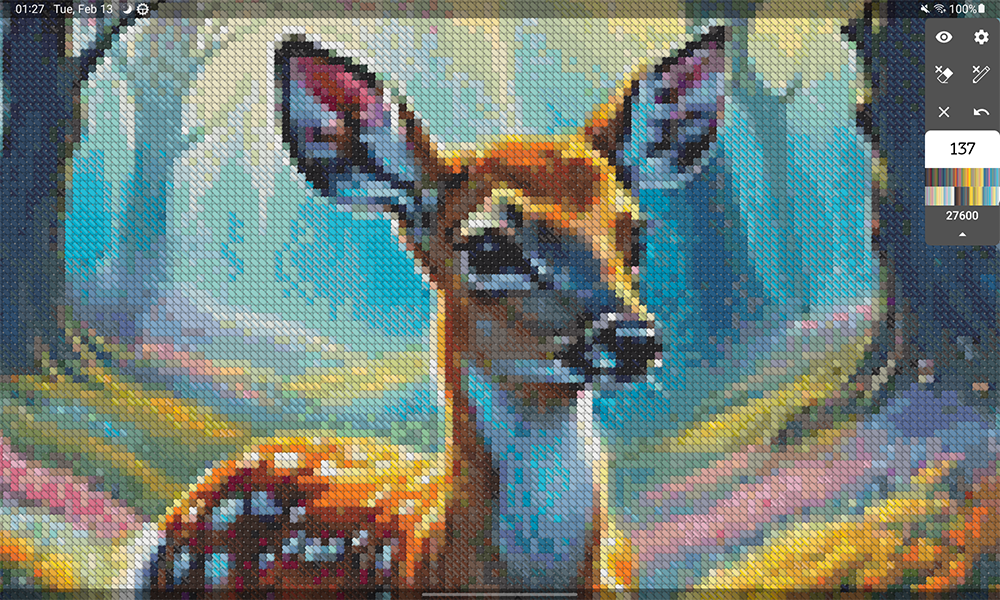 Result pattern in the stitch preview mode
Features of working with pixel art
- You need to look for pictures where one pixel in the picture corresponds to one pixel in the image.
- You need to disable resizing so as not to “smooth” the picture.
- You need to disable Dithering; usually in pixel art it is already applied.
- It is better to set the number of solids larger, anyway there will not be more of them than the colors in the picture.
- You need to disable the removal of singles and set the minimum quantity to 1, since in pixel art usually every pixel is in its place.